Friday, October 30, 2009

Carving the top and routing out the pick-up cavities


I have screwed my body contour template to the body and I am ready to rout the first step.

After the first step of the contour is completed. I made three passes to achieve the desired depth.


After I cut the template down and reattaching you now see the second step. This was done making two passes.

Here I have completed the 3rd step.

After the 4th step.

My first major mistake! This is what happens when just for a moment you lose focus. The 5th step I let the route rock and you see the damage. I will hopefully be able to cover this up in the carve. The routing for the carve is complete. I was going to rout the cavities for the pick-ups now but I want to see the if the screw up can be fixed in the carve. So I am going to carve this section first.

I think it will be OK. I will have to do a little more carving at that level all the way around to make it uniform but I don't think I will have to remove the maple top.

Using 2 faced tape I have attached the template for the pick-ups. I will drill out most of the stock.

Now I am ready to rout.

I repeated the process for the second cavity.

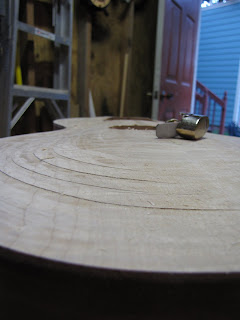
Now carve and more carving with the thumb plane. Which will give you a good blister on it. Of course after getting the blister I started wearing a glove.
Getting closer.

Are we done yet?

The jig and using it


Here is the body placed inside the new jig I made. I will be using this to bevel the face at the neck joint to 4.5 degrees.

I use the angle gauge to transfer the exact angle to the jig.

Here I use the pre-set angle on the gauge the set  the angle on the jig.

Now you can see how this is going to work.

Now I have to move the top guide down on the jig to complete.

After beveling the face of the body I now have the transpose the angle to the bottom the neck pocket (mortise). I do this by carefully using the router on the bevel created. Here I have made the first pass and you can see I still need to be a little deeper.

As you can see here I am very close now. One more slight adjustment and we are done.

Thursday, October 22, 2009

Routing out the mortise in the body


I have attached the template with 2 screws


I am using a 1 3/8" forstner bit to remove most of the stock to a depth of 1 7/16"


Next I will use a router to remove the rest.


After the first pass


I now have removed the template. You can see that the 2 screws were set where the pick-ups cavities will be. Now for another pass.


I still have more to do with this mortise. I still have to router the bottom at a 4.5 degree angle. That will be later. Now the moment of truth. Time to check the fit of the neck. To see if the center line in the neck lines up with the center line of the body.


I have pulled a guitar string down the center of the neck and it lines up perfectly with the center line of the body. Whew!


The next step is building a jig for beveling the face of the body at 4.5 degrees and starting to form the arch top.

Wednesday, October 21, 2009

Template for routing the mortise


As you can see I changed my mind on how to create a template for this mortise. This template was made using my router mounted in my table saw. I used the fence to insure that the sides are perfectly straight.

The fitting of the neck in the template looks very good.

Saturday, October 10, 2009

Getting ready to do some more work on the body


Here I have marked parallel lines off the center line down the entire body just a hair narrower then the width of  the tenon. I can always sand the tenon a little to make a tight fit. I have done lots of thinking on how to route this mortise.  I think I am going to screw to pieces of MDF with a perfect straight edges down along the lines I marked. Placing the screws where I will be routing out the pick-ups. This is the most critical step I am getting ready to attempt. Lots of blogs I have seen on building a guitar with a set neck (by people who are not luthiers) end at this step.  Stay tuned and see what happens.

Making another template

I just got my Dimarzio's in.  Now I need a template to route out the body for them.

The prints I have for the 59 Les Paul actually have to different size template patterns for the neck and bridge.
After checking my pick-ups with patterns I traced I will be using the smaller of the two for both pick-ups.
First I drill eight  - 3/8th " holes.

Installing the truss rod


Here I put tape on each side of the truss rod channel to prevent any silicone from getign in contact with the wood. I put just a little silicone in the channel.


Here I have inserted the truss rod and now I have glued the plug in over the nut.