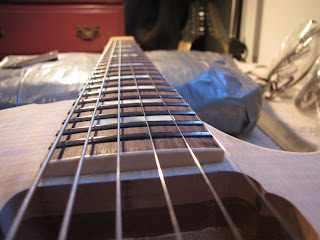
In order to make the nut I need to put on the bridge, tail piece and tuning keys.
I first soldered a ground wire on one of the anchors for the tail and then applied a little tight bond and hammered it in the hole closest to the controls. I then glued in the other anchor for the tail piece. I then hammered in the anchors for the bridge with out glue as I will remove these after the making of the nut for final sanding and the finish.
Marking the rough out line of the nut. I will take this and remove most the stock on my belt sander and then use files to refine the shape.
Installing the tuning keys.
This is the rough version. I first used a Stew/Mac string spacing rule to mark the nut. Then a .010 saw to start the slots. I then used various sizes depending on with string slot I was working to finish the grooves.
Made by placing the nut in position and stringing. Using an action gauge I cut the nut slots using different size nut files until the string has a clearance of .025 of an inch over the first fret.
These are the different files I used along with the string set up gauge from Stew/Mac and just a feeler gauge.
With the nut complete and action set. I have .060 of and inch at the 22nd fret for the high -E- and .070 of and inch for the Low -E-.

One last look before I remove everything and get this ready for the finish.
The finished nut after removing all the hard ware from the guitar. I have decided to glue the nut in after finishing the guitar.


No comments:
Post a Comment